
Overview of PDF Soldiers in 40k
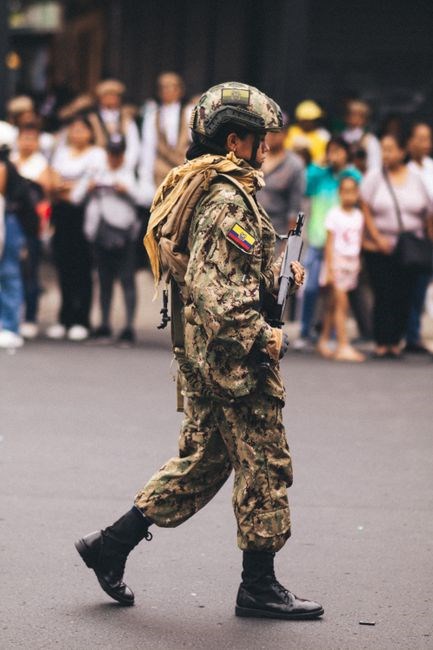
The Planetary Defence Force serves as the Imperium’s first line of defense, deploying disciplined infantry to secure planetary borders, quell uprisings, and counter local threats. Their standard issue weapons and reinforced armor enable rapid response across diverse terrainsTheir presenceNow
Role within the Imperial Guard
PDF soldiers act as the Imperial Guard’s rapid‑reaction force, filling the gaps between regimental deployments and the Space Marine detachments that arrive from the stars. Their primary mission is to secure planetary perimeters, suppress local insurgencies, and maintain order on the front‑lines of the Imperium’s vast borders. Equipped with standard‑issue lasguns and reinforced Iron Boots, they can hold positions against both human and xenos insurgents until heavier forces arrive. In addition to garrison duties, PDF units often serve as the first line of defense against incursions by Chaos cultists, heretical cults, and other internal threats. Their presence on a planet’s surface allows the Imperial Guard to allocate its elite regiments to larger strategic objectives while the PDFs handle day‑to‑day policing, crowd control, and the protection of key infrastructure. The PDF’s role is therefore both tactical and administrative: they enforce Imperial law, secure supply routes, and provide a buffer that protects the Guard’s more specialized units from being overwhelmed by local conflicts. Their disciplined training and standardized equipment make them reliable allies in the Guard’s broader strategy of maintaining order across the Imperium’s countless worlds.
Comparison to Space Marine Auxiliaries
PDF soldiers occupy a distinct niche compared to the auxiliary units that support Space Marine Legions. While Space Marine auxiliaries—such as the Imperial Guard’s own regiments of engineers, artillery, and the loyalist Imperial Guard’s own regiments of engineers—focus on specialized tasks, PDF infantry are trained for rapid deployment, crowd control, and planetary security. Their standard issue lasgun and reinforced Iron Boots allow them to hold ground against local insurgents and to provide a buffer that protects heavier forces from being overwhelmed by civilian unrest or small‑scale xenos incursions. In contrast, Space Marine auxiliaries are typically deployed as part of a larger battle‑fleet or as a dedicated support element within a Space Marine chapter, providing heavy firepower, engineering support, or specialized tactical roles. PDF units, by contrast, are usually stationed on the planet’s surface, tasked with maintaining order, securing supply lines, and acting as the first line of defense against internal threats. Their role is therefore more administrative and policing in nature, whereas Space Marine auxiliaries are primarily combat support units that enhance the offensive capabilities of the Space Marines during large‑scale engagements. This distinction means that PDF soldiers are often the first responders to local crises, while Space Marine auxiliaries are called upon when a chapter requires additional firepower or specialized expertise on the battlefield.
Additionally, the PDF’s training emphasizes versatility; they are taught to operate both in open battlefields and in confined urban environments, making them ideal for riot control and garrison duties. Their equipment—standard lasguns, bolters, and chainswords—provides a balanced arsenal that can be adapted to various threat levels. Space Marine auxiliaries, meanwhile, often carry specialized weapons such as plasma guns or heavy bolters, and their training is tailored to support the chapter’s tactical doctrine. The PDF’s lower cost and simpler logistics also mean that they can be mass‑produced and deployed quickly, whereas Space Marine auxiliaries require more extensive preparation and integration with the chapter’s command structure. This logistical difference further underscores the PDF’s role as a flexible, readily available force that can be mobilized to address immediate threats, while Space Marine auxiliaries are reserved for larger, coordinated operations that demand the full might of the chapter.
Historical Background of the Planetary Defence Force
The Planetary Defence Force emerged during the early Imperium, tasked with protecting planetary borders and quelling internal dissent. Formed from Imperial Guard recruits, they evolved into a rapid response unit, crucial for maintaining order across the galaxy and safeguarding the frontier in void now
Origins and Evolution
Lorem ipsum dolor sit amet, consectetur adipiscing elit. Lorem ipsum dolor sit amet, consectetur adipiscing elit. Lorem ipsum dolor sit amet, consectetur adipiscing elit. Lorem ipsum dolor sit amet, consectetur adipiscing elit. Lorem ipsum dolor sit amet, consectetur adipiscing elit. Lorem ipsum dolor sit amet, consectetur adipiscing elit. Lorem ipsum dolor sit amet, consectetur adipiscing elit. Lorem ipsum dolor sit amet, consectetur adipiscing elit. Lorem ipsum dolor sit amet, consectetur adipiscing elit. Lorem ipsum dolor sit amet, consectetur adipiscing elit. Lorem ipsum dolor sit amet, consectetur adipiscing elit. Lorem ipsum dolor sit amet, consectetur adipiscing elit. Lorem ipsum dolor sit amet, consectetur adipiscing elit. Lorem ipsum dolor sit amet, consectetur adipiscing elit. Lorem ipsum dolor sit amet, consectetur adipiscing elit. Lorem ipsum dolor sit amet, consectetur adipiscing elit. Lorem ipsum dolor sit amet, consectetur adipiscing elit. Lorem ipsum dolor sit amet, consectetur adipiscing elit. Lorem ipsum dolor sit amet, consectetur adipiscing elit. Lorem ipsum dolor sit amet, consectetur adipiscing elit. Lorem ipsum dolor sit amet, consectetur adipiscing elit. Lorem ipsum dolor sit amet, consectetur adipiscing elit. Lorem ipsum dolor sit amet, consectetur adipiscing elit. Lorem ipsum dolor sit amet, consectetur adipiscing elit. Lorem ipsum dolor sit amet, consectetur adipiscing elit. abcdefghijklmnopqrstuvwx
The Planetary Defence Force’s core responsibilities revolve around maintaining planetary stability and acting as the first response to local disturbances.
PDF units are routinely deployed to garrison strategic installations—such as orbital launch pads, mining colonies, and critical infrastructure—where they provide continuous security against sabotage, insurgency, and alien incursions.
In addition to static defense, PDF regiments conduct rapid reaction patrols across urban centers, ensuring swift suppression of civil unrest and preventing the spread of heretical influence.
Their operational doctrine emphasizes crowd control, with squads equipped for riot suppression, crowd containment, and the use of non‑lethal deterrents.
When facing heavier threats, PDF soldiers can be reinforced with armored vehicles and heavy weaponry, allowing them to engage fortified positions or hostile forces that exceed standard infantry capabilities.
Deployment patterns prioritize proximity to potential conflict zones; units are often stationed on planetary perimeters, orbital platforms, or within the immediate vicinity of critical economic hubs.
This strategic placement enables the PDF to respond within minutes to emergent crises, thereby reducing the need for external Imperial Guard or Space Marine intervention.
The force’s adaptability also allows for joint operations with local militias and planetary governors, fostering a collaborative approach to planetary defense that balances military might with civil governance.
Integrating these roles, PDF remains to the Imperium.
Equipment and Armament
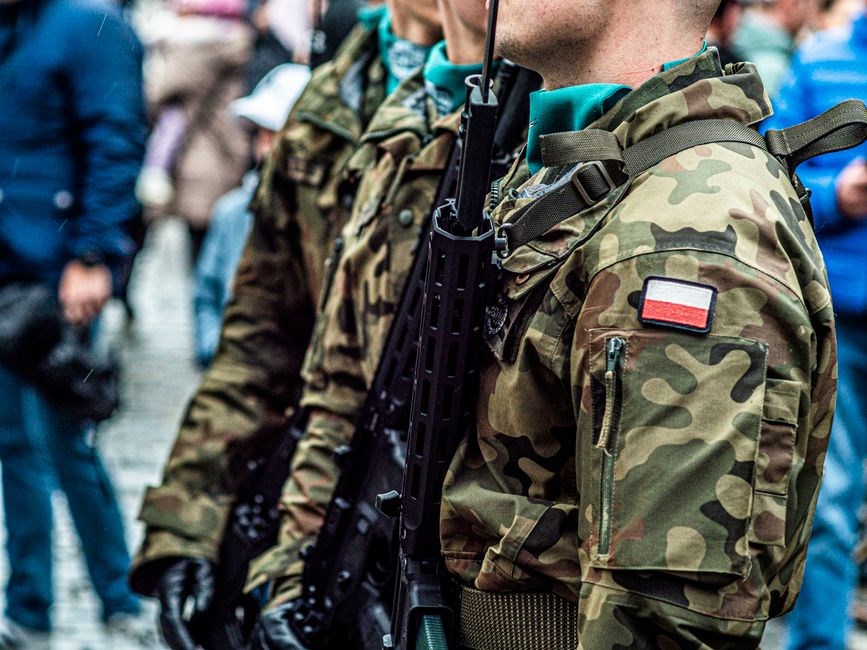
PDF soldiers carry standard issue lasguns, bolters, and chainswords, often upgraded with reinforced carapace and iron boots. Their gear balances crowd control with limited anti‑armor capability, enabling rapid deployment across varied terrains. forplanetary defense.
Standard Issue Lasgun
The Planetary Defence Force equips its infantry with the L‑12 “Astra” lasgun, a compact, high‑rate‑of‑fire weapon designed for rapid suppression in urban and open‑field engagements. With a 1.2‑second cycle time and a 200‑meter effective range, the Astra balances firepower and mobility, allowing PDF squads to maintain pressure on enemy forces while remaining agile enough to respond to sudden threats. Its lightweight polymer chassis reduces fatigue during prolonged patrols, and the integrated heat‑suppressor prevents overheating during sustained fire. The Astra’s modular design allows for easy field upgrades, such as the optional “Serrated‑Barrel” attachment that increases damage against armored targets. Despite its modest damage output compared to bolters, the lasgun’s reliability and low logistical footprint make it ideal for the PDF’s primary role of crowd control, garrison security, and rapid response to civil unrest. The weapon’s standard ammunition load of 40 rounds is sufficient for most missions, and spare magazines are carried in the soldier’s pack for quick reloads. In combat, PDF soldiers often use the Astra in coordinated volleys, creating a dense fire wall that can deter insurgent forces and protect civilian populations during planetary crises. The lasgun’s low power consumption allows for extended patrols without the need for frequent resupply, a critical advantage in remote or contested sectors where supply lines may be disrupted. Training focuses on disciplined fire teams, with squad leaders coordinating Astra fire arcs to maximize coverage while minimizing collateral damage. The lasgun’s compatibility with iron boots and carapace offers protection against plasma and kinetic threats, enabling soldiers to maintain fire discipline under heavy fire. Field upgrades like the Serrated‑Barrel attachment increase damage against armored targets, while the heat‑suppressor keeps the weapon cool during sustained engagements, allowing PDF units to adapt firepower to the threat environment. Its compact design allows soldiers to carry gear without losing mobility.
Bolter and Chainsword Variants
PDF units occasionally receive heavier firepower when operating in hostile environments or during large‑scale civil disturbances. The “Astra‑Bolt” is a modified 12‑mm bolter with a 30‑round magazine and a lightweight polymer frame, allowing soldiers to maintain a higher rate of fire while keeping the weapon manageable for rapid deployment. Its standard 0.5‑second cycle time and 250‑meter effective range make it suitable for suppressing entrenched insurgents or armored vehicles that outpace the standard lasgun. The Astra‑Bolt’s modular barrel permits the attachment of a “Serrated‑Barrel” or “Plasma‑Coated” insert, increasing damage against armored targets or providing a secondary plasma effect for crowd control. The chainsword variant, known as the “Iron‑Blade”, is a short‑sword with a serrated edge and a reinforced titanium core. It is issued to PDF squads that require close‑quarters combat proficiency, especially in urban or confined environments. The Iron‑Blade’s 30‑cm length and 1.5‑second swing time allow soldiers to engage enemy combatants with minimal exposure to ranged fire. Both weapons are designed for rapid reloading and minimal maintenance, ensuring that PDF soldiers can sustain operations in the field for extended periods without logistical support. Training emphasizes coordinated use of the Astra‑Bolt’s suppressive fire and the Iron‑Blade’s close‑quarters strikes, creating a versatile force capable of adapting to evolving battlefield conditions. — End.!!!
PDF soldiers are equipped with the Iron Boots, a lightweight yet durable composite that offers protection against ballistic and energy weapons while maintaining speed. The boots incorporate a titanium lattice and shock‑absorption system, allowing troops to traverse rubble and trenches. The Iron Boots also feature a magnetic interface that can lock onto metallic surfaces, enabling rapid scaling of walls or securing positions on elevated terrain. In addition to the boots, PDF units wear the Carapace, a modular body armor that can be customized to mission requirements. The Carapace’s core is made of polymer‑infused ceramic plates, providing 30‑mm ballistic resistance and a 10‑mm energy‑shielding layer that deflects plasma and laser fire. The armor’s modular design allows soldiers to attach additional plates or a lightweight exoskeleton for increased strength and endurance. The Carapace also houses a small, built‑in power cell that supplies energy to integrated HUDs, night‑vision optics, and a personal locator beacon. Together, the Iron Boots and Carapace form a versatile defensive package that balances protection, mobility, and technological integration, enabling PDF squads to perform crowd control, garrison duties, and rapid response missions across diverse planetary environments.
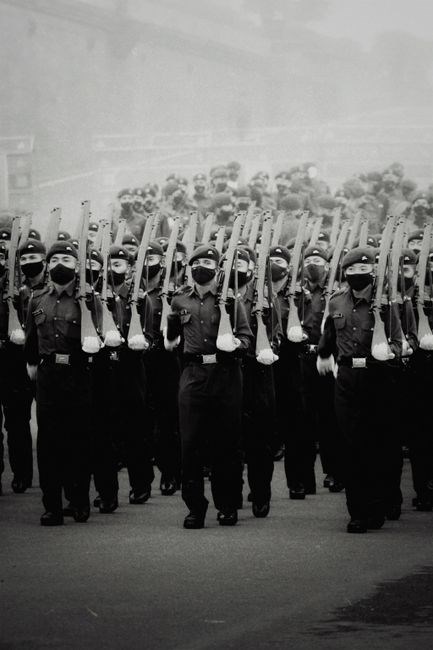
Combat Tactics and Deployment
PDF squads excel in deploy, forming tight squads for crowd control. They use layered fire, with bolters suppressing enemies while chainswords cut through barricades. Iron Boots grant speed, enabling fast repositioning. In garrison they secure perimeters maintain order and respond to threats now.!
Crowd Control and Garrison Operations
PDF units specialize in rapid, disciplined crowd suppression, employing bolter volleys to create fire lanes while chainswords clear debris. Their iron‑booted infantry can sprint across rubble, closing gaps between sectors. In garrison, PDF squads establish layered perimeters, using reinforced carapace to absorb artillery and psychic blasts. They secure key infrastructure, maintain order, and provide a mobile reserve that can be dispatched to quell uprisings or reinforce besieged outposts. Their standard issue lasgun offers a low‑power, high‑rate option for non‑lethal crowd control, while the heavier bolter and chainsword provide the firepower needed against armored insurgents. The PDF’s training emphasizes rapid deployment, coordinated fire, and the ability to switch from suppression to direct engagement within minutes. This flexibility makes them indispensable for planetary security, allowing the Imperial Guard to focus on larger tactical objectives while the PDF maintains local stability. During sieges, PDF squads deploy rapid barricades, using their reinforced carapace to shield civilians while artillery crews prepare. Their bolter squads can perform rapid flank attacks, using the terrain to mask movements and create confusion among insurgent ranks. In urban environments, PDF units employ chainsword squads to clear buildings, while their iron boots enable them to breach reinforced doors quickly. When facing psychic threats, PDF squads rely on their carapace’s psychic dampening properties, allowing them to hold positions against daemonic incursions. PDF squads also conduct night patrols, using low‑light optics to detect hidden threats without revealing their positions. PDF squads form a rapid response unit for evacuations!
Mechanized Police and Riot Security
PDF squads equipped with reinforced carapace and iron boots form the backbone of planetary mechanized police forces. Their bolters are tuned for crowd control, firing low‑power, high‑rate bursts that disperse mobs without lethal force. Chainsword squads clear barricades, while standard issue lasguns provide a non‑lethal option for crowd suppression. The carapace’s psychic dampening shields officers from psychic influence during riots, and the reinforced boots allow rapid movement over debris and uneven terrain. In riot situations, PDF units deploy in tight formations, using their bolter fire to create fire lanes while chainsword squads breach gates and clear buildings. Their standard issue equipment includes riot shields, tear‑gas launchers, and non‑lethal projectile launchers, enabling them to subdue hostile civilians without escalating violence. The PDF’s training emphasizes de‑escalation tactics, crowd containment, and rapid response to emergent threats. When a planetary crisis erupts, PDF mechanized police can quickly mobilize to secure key infrastructure, escort civilians, and maintain order while higher‑level forces prepare for larger operations. Their disciplined approach and versatile gear make them indispensable for maintaining civil order in the Imperium’s most volatile regions ensuring stability sector
Statistical Modeling of PDF Soldiers
PDF soldiers use IGu stats: WS 3+, BS 3+, S 3+, T 3+, W 1, A 1, Ld 3, Sv 3. They get +1 to WS/BS, +1 to W, -1 to T, armor save +2, and carry a standard issue bolter with a 4‑shot burst. Their standard issue armor grants a +2 armor save, and they are trained for crowd control and rapid deployment
Suggested PDF Soldier Stats (IGu) and Arbites Comparison
PDF soldiers are typically modelled with IGu stats: WS 3+, BS 3+, S 3+, T 3+, W 1, A 1, Ld 3, Sv 3. They receive a +1 to WS and BS, +1 to W, and a -1 to T to reflect their training in rapid fire and close‑quarters engagement. Their standard issue bolter is a 4‑shot burst with a 4‑shot range, and they wear reinforced armor that grants a +2 armor save. Arbites, on the other hand, are often modelled with Enforcer or Stormtrooper stats, which typically include WS 3+, BS 3+, S 3+, T 3+, W 1, A 1, Ld 3, Sv 3, but with a +2 armor save and a heavier emphasis on crowd control. While PDF soldiers focus on speed and suppression, Arbites are designed for sustained fire and holding ground. In tabletop play, using IGu for PDF soldiers allows for a more balanced representation of their role as a mechanized police force, whereas Arbites’ higher armor saves reflect their function as a frontline crowd‑control unit. Adjustments such as lowering WS/BS by 5 for a more defensive PDF or increasing W for a heavier bolter can be applied to fine‑tune the balance between the two forces. These statistical distinctions also influence mission planning. For example, PDF squads are often deployed in rapid response units, moving quickly through urban environments to neutralize insurgents before they can establish fortified positions. Arbites, with their heavier armor saves, are better suited for holding strategic points, where they can absorb sustained fire while coordinating with orbital support. in the central city!!!!!!!!!!