Adjusting a 1950s three-speed manual clutch involves understanding its vital role in smooth operation and gear changes, ensuring a pleasurable driving experience.
Understanding the Importance of Clutch Adjustment
Proper clutch adjustment is paramount for a 1950s vehicle with a manual transmission. A correctly adjusted clutch ensures seamless gear changes, preventing grinding or difficulty selecting gears. It facilitates a smooth connection between the engine and gearbox, maximizing power transfer and minimizing wear on components. Misalignment can lead to clutch slippage, causing reduced acceleration and increased fuel consumption. Conversely, a too-tight clutch results in dragging, straining the throw-out bearing and potentially damaging the transmission. Regular adjustment maintains optimal performance, extends clutch life, and enhances the overall driving experience of these classic automobiles.
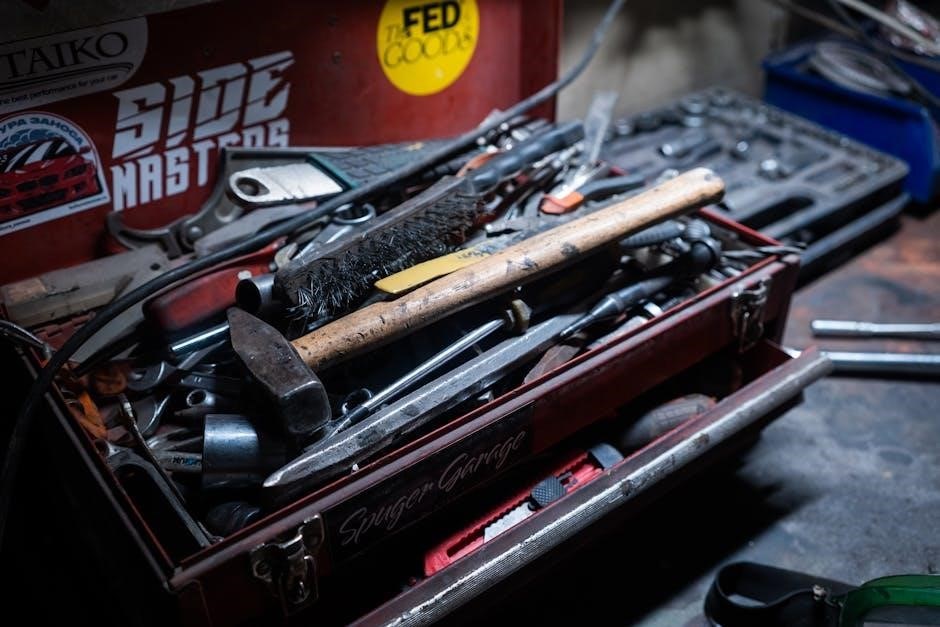
Tools Required for Adjustment
Adjusting a 1950s manual clutch necessitates a few essential tools. A set of open-end wrenches, typically ranging from 7/16″ to 1/2″, is crucial for loosening and tightening adjustment points. Screwdrivers, both flathead and Phillips head, are needed for accessing and manipulating linkage components. Pliers can assist with cable adjustments. A flashlight illuminates dark areas under the vehicle. Penetrating oil loosens corroded parts. Finally, a feeler gauge verifies proper cable free play, ensuring accurate and reliable clutch engagement for optimal performance.
Identifying Clutch Issues
Recognizing clutch problems is key; symptoms include slipping gears, difficulty shifting, a noisy pedal, or the clutch dragging—indicating a needed adjustment.
Symptoms of a Misadjusted Clutch
A misadjusted clutch on a 1950s vehicle manifests in several ways. Slipping gears, particularly during acceleration, is a common indicator, suggesting insufficient clamping force. Difficulty shifting, requiring excessive force or resulting in grinding noises, also points to an issue.
A clutch pedal that feels excessively high or low, lacking its usual travel, is another telltale sign. Furthermore, the clutch may drag, making it hard to shift into gear even with the pedal fully depressed. These symptoms collectively suggest the need for careful clutch adjustment to restore optimal performance and prevent further wear.
Common Causes of Clutch Problems in 1950s Vehicles
Several factors contribute to clutch issues in vintage 1950s vehicles. Cable stretch is frequent, altering free play and engagement. Linkage wear, including pivot points and rods, introduces slack and imprecise operation.
The clutch disc itself can become worn or contaminated with oil, reducing friction. Furthermore, a failing throw-out bearing or a warped pressure plate can cause engagement problems. Environmental factors like moisture and corrosion also play a role, affecting component functionality and necessitating regular inspection and adjustment.
Preliminary Checks Before Adjustment
Before adjusting, inspect the clutch cable and linkage for wear, damage, or corrosion, ensuring smooth movement and proper connection for optimal performance.
Checking Clutch Cable Free Play
Assessing clutch cable free play is crucial before adjustment. With the engine off, fully depress the clutch pedal and note the amount of slack in the cable at the lever.
Typically, 1950s vehicles require approximately 1/2 to 1 inch of free play. Insufficient free play can cause the clutch to drag, while excessive play hinders complete disengagement.
Carefully measure this distance to establish a baseline and determine the necessary adjustment. A worn or stretched cable may require replacement rather than simple adjustment.
Inspecting the Clutch Linkage
Before adjusting, thoroughly inspect the clutch linkage for wear or damage. This includes checking all pivot points, connecting rods, and the clutch fork itself for looseness or corrosion.
Ensure all connections are secure and properly lubricated. Worn or damaged linkage components can mimic the symptoms of a misadjusted clutch, leading to inaccurate adjustments.
Pay close attention to the condition of the bushings and ball joints, replacing any that exhibit excessive play. A smooth, responsive linkage is essential for proper clutch operation.
Adjusting the Clutch Cable
Proper clutch cable adjustment is crucial for optimal engagement, ensuring smooth gear changes and preventing premature wear on clutch components.
Locating the Clutch Cable Adjustment Point
Identifying the clutch cable adjustment point on a 1950s vehicle requires careful observation. Typically, it’s found where the cable enters the clutch linkage, often near the transmission or on the pedal assembly.
Look for a threaded section with locknuts on either side of an adjustable clevis or a similar mechanism. Some systems utilize a turnbuckle-style adjuster. The precise location varies by manufacturer and model, so consulting a shop manual specific to your vehicle is highly recommended for accurate identification.
Step-by-Step Clutch Cable Adjustment Procedure
Begin by loosening the locknuts surrounding the clutch cable adjuster. Next, slowly turn the adjuster to increase or decrease cable tension. Aim for approximately 1/2 to 1 inch of free play at the pedal – this is crucial.
Tighten the locknuts securely once the desired free play is achieved. Test the clutch engagement by attempting to shift gears; it should engage smoothly without dragging or slipping. Re-adjust if necessary, prioritizing a comfortable and responsive pedal feel.

Adjusting the Clutch Fork
Fine-tuning the clutch fork ensures proper throw-out bearing contact, optimizing clutch engagement and disengagement for smooth shifting performance.
Accessing the Clutch Fork Adjustment
Gaining access to the clutch fork adjustment typically requires working underneath the vehicle, necessitating proper safety precautions like jack stands. Locate the clutch fork, a lever-like component connected to the clutch release mechanism.
On many 1950s models, an access cover on the transmission housing provides a view and limited working space. Some vehicles may require partial removal of the floor pan or transmission components for sufficient access. Identify the adjustment screw or linkage point on the fork itself, which controls the clutch’s engagement point.
Fine-Tuning the Clutch Fork for Optimal Engagement
After accessing the adjustment point, small adjustments to the clutch fork are crucial. Loosen the locking nut, then incrementally adjust the screw to modify clutch engagement. The goal is smooth, predictable engagement without slippage or dragging.
Start with small turns, testing the pedal feel after each adjustment. Proper engagement occurs when the clutch begins to grab near the top of the pedal travel. Avoid excessive adjustment, which can cause premature wear or difficulty shifting.

Troubleshooting Adjustment Issues
Persistent slipping or dragging after adjustment indicates underlying problems beyond simple cable or fork tuning, requiring further inspection of components.
Clutch Still Slipping After Adjustment
If the clutch continues to slip even after careful adjustment, several issues could be present. Worn clutch facings are a primary suspect, reducing friction and preventing full engagement.
Contamination from oil or grease on the clutch disc also diminishes its ability to grip. Inspect the rear main engine seal for leaks. A stretched or damaged clutch cable, despite adjustment, may not provide sufficient throw.
Finally, a failing clutch pressure plate can’t generate enough force to fully clamp the disc. Thorough inspection of these components is crucial for diagnosis.
Clutch Dragging After Adjustment
If the clutch drags after adjustment, meaning it doesn’t fully disengage when the pedal is pressed, it hinders smooth shifting. This often indicates insufficient clearance between the clutch disc, pressure plate, and flywheel.
Check for debris or corrosion on these surfaces. A binding clutch cable, even with free play, can prevent complete disengagement. Inspect the clutch fork and its pivot point for proper lubrication and movement.
Worn or damaged throw-out bearing can also cause drag. Careful examination and lubrication are essential to resolve this issue.

Specific Considerations for 1950s Transmissions
Older systems, like Borg & Beck, demand precise adjustment; worn components require extra attention and may necessitate replacement for optimal clutch function.
Variations in Clutch Systems (e.g., Borg & Beck)
Many 1950s vehicles utilized different clutch designs, notably the Borg & Beck system, a diaphragm spring clutch requiring specific adjustment techniques. Unlike earlier cone clutches, these demand careful free play and fork adjustment.
Understanding the specific system is crucial; Borg & Beck clutches are sensitive to cable stretch and linkage wear. Variations exist even within the Borg & Beck line, impacting adjustment points. Incorrect adjustment can lead to slipping or dragging, necessitating a thorough understanding of the manufacturer’s specifications for your particular vehicle and transmission combination.
Dealing with Worn Components
Clutch adjustment on older vehicles often masks underlying issues from worn components. Excessive cable stretch, a common problem, requires frequent adjustments, signaling cable replacement. Worn clutch forks, linkage bushings, and throw-out bearings contribute to imprecise engagement and adjustment difficulties.
Inspect these parts during adjustment; simply adjusting a worn system is a temporary fix. A slipping clutch might indicate a glazed or worn clutch disc, demanding replacement rather than further adjustment. Addressing worn components ensures a lasting and reliable repair, preventing recurring issues.

Lubrication of Clutch Components
Proper lubrication is essential for smooth clutch operation, reducing wear on critical parts like the cable, fork, and linkage, ensuring longevity.
Recommended Lubricants for 1950s Clutches
For 1950s manual clutches, selecting the correct lubricant is paramount for optimal performance and longevity. Chassis grease, a petroleum-based product, was commonly used on clutch linkages and pivot points. High-temperature grease is ideal for the throw-out bearing, resisting breakdown from friction-generated heat.
Avoid modern synthetic lubricants, as they may contain additives incompatible with the materials used in older clutches. Light engine oil can lubricate the cable, preventing fraying and ensuring smooth travel. Regular application prevents corrosion and sticking, maintaining efficient clutch engagement and disengagement.
Lubrication Points on the Clutch System
Key lubrication points on a 1950s manual clutch system include the clutch cable, where light engine oil prevents internal friction and corrosion. The clutch fork pivot point requires chassis grease for smooth operation, reducing wear. The throw-out bearing necessitates high-temperature grease to withstand heat.
Don’t neglect linkage connections; grease these regularly. Inspect and lubricate the pedal pivot points as well. Proper lubrication minimizes wear, ensures smooth engagement, and prevents sticking, contributing to a longer clutch lifespan and easier gear changes.
Safety Precautions
Always use jack stands when working under the vehicle, and disconnect the battery’s negative terminal to prevent accidental electrical shorts during adjustment.
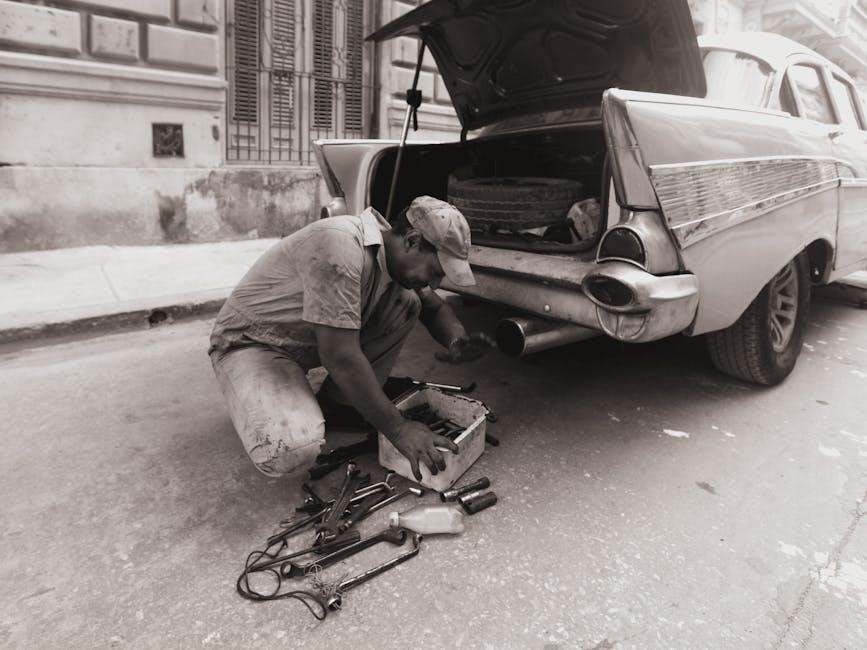
Working Under the Vehicle
Prioritize safety when accessing the clutch linkage. Never rely solely on a jack; always support the vehicle with properly rated jack stands positioned under the frame rails.
Ensure the vehicle is on a level surface before lifting. Chock the rear wheels for added security. Inspect the jack stands for damage before use.
Wear safety glasses to protect your eyes from debris. Consider wearing gloves to protect your hands.
Double-check the stability of the vehicle before beginning any work underneath.
Disconnecting the Battery
Before commencing any electrical component work, including clutch adjustments that might involve electrical connections, disconnect the negative battery terminal.
This prevents accidental short circuits and potential damage to the vehicle’s electrical system. Use a wrench to loosen the nut on the negative terminal and carefully remove the cable.
Tuck the cable away from the terminal to avoid accidental contact.
Remember to have the radio code available if required upon reconnection.
Post-Adjustment Testing
A thorough road test confirms smooth engagement, quiet operation, and effortless gear changes, verifying successful clutch adjustment and optimal performance of the transmission.
Road Test Procedures
Begin with a slow, first-gear start, carefully monitoring for clutch slippage or grabbing. Gradually increase speed, shifting through all gears, paying attention to engagement points and smoothness.
Listen for unusual noises during shifts and while cruising. Test the clutch’s holding power by attempting to accelerate in a higher gear.
Perform several stops and starts to assess consistent performance. If any issues arise – like difficulty shifting or continued slippage – further adjustment or inspection is necessary.
Checking for Smooth Gear Changes
After adjustment, verify smooth transitions between all gears during a road test. Shifts should be effortless, without grinding or resistance. A properly adjusted clutch allows for quick, clean engagement into each gear.
Pay close attention to the synchronization; hesitation or jerking indicates potential issues.
Ensure the clutch fully disengages, preventing gear clash during shifting. Consistent, fluid gear changes confirm successful adjustment and optimal clutch performance in your 1950s vehicle.
Maintaining Clutch Adjustment
Regular inspection and minor adjustments are crucial for preserving optimal clutch performance and extending the lifespan of this vital component.
Regular Inspection Schedule
Establish a routine for checking your 1950s manual clutch. Inspect the clutch cable for fraying or damage monthly, and verify free play. Every 6,000 miles, or bi-annually, thoroughly examine the linkage for wear and lubrication needs.
Pay close attention to pedal feel; changes indicate potential issues. A yearly deep dive should include checking the clutch disc’s condition if accessible. Consistent monitoring prevents major repairs and ensures reliable operation, preserving the classic driving experience.
Preventative Measures to Prolong Clutch Life
To maximize the lifespan of your 1950s manual clutch, avoid “riding” the clutch, which causes excessive wear. Fully depress the pedal during gear changes and release smoothly. Ensure proper engine speed matching during shifts to minimize stress on the system.
Regularly lubricate linkage points and inspect for leaks. Address any clutch slippage or dragging promptly. Gentle driving habits and consistent maintenance are key to preserving this vital component for years to come.

Resources and Further Information
Online forums and original repair manuals offer invaluable insights into 1950s clutch systems, aiding successful adjustment and troubleshooting efforts.
Online Forums and Communities
Dedicated online forums are a treasure trove of knowledge for owners of classic 1950s vehicles. These communities often host detailed discussions specifically about clutch adjustment on three-speed manual transmissions.
Members frequently share their experiences, troubleshooting tips, and even photos or videos demonstrating the adjustment process. Searching these forums can reveal solutions to common issues and provide valuable insights beyond what’s found in repair manuals.
Look for forums dedicated to specific vehicle makes (e.g., Ford, Chevrolet) or to vintage cars in general. Active participation and asking specific questions can yield personalized guidance from experienced enthusiasts.
Repair Manuals for 1950s Vehicles
Original factory repair manuals are invaluable resources for adjusting the clutch on a 1950s three-speed manual transmission. These manuals provide detailed diagrams and step-by-step instructions specific to your vehicle’s make and model.
They outline the correct adjustment procedures, torque specifications, and lubrication requirements. Reproduction manuals are readily available if an original is difficult to find.
Supplementing the manual with a general automotive repair guide from the era can also be helpful, offering broader context and troubleshooting advice.